
PRINT PROCESSES - RESEARCH
I started my research into hand rendered print processes by outlining a list of techniques my guide could focus on;
Relief Printing;
Relief Printing;
- Mono-print.
- Lino-cut prints.
- Collagraph.
- Relief Etching.
Intagilo Printing;
- Drypoint.
- Etching.
Other Print methods;
- Letter press.
- Screen-printing.
Next, I used the results from my survey to define the print methods most used by students;
I will focus my research on these methods as they are most relevant to my target audience. However, I will also collect research into the less relevant techniques as I want my guide to provide information about a range of different print methods.
- Screen print.
- Mono-print.
- Lino.
- Etching.
- Letter press.
- Laser cutter.
- Digital methods (assorted).
I will focus my research on these methods as they are most relevant to my target audience. However, I will also collect research into the less relevant techniques as I want my guide to provide information about a range of different print methods.

Secondary Research
While in the print room I came across a helpful handout made available to students in the print room. Although these are available they don't seem to be used that often, after speaking to other students I came to the conclusion that people often forget that they are available.

Print techniques can be divided into three categories;
- Mono - A one off print.
- Relief - Ink goes on the surface of the printing block - Lino & Woodcut.
- Intaglio - Ink below the surface of the matrix.
- Stencil - Stencils used to print images - Screen-printing.
Mono-print - Primary Research
The results from my survey showed mono-printing to be one of the most relevant to students. As this print method is available to try at university I decided to do a print experiment with the technique.
OVERVIEW
A mono-print is a printing method which entails placing stock on an inked surface while applying pressure to specific areas, this transfers the ink to the paper in the areas where most pressure is applied. Due to this the technique can only produce one off prints which is a big set back if you are looking to produce multiple prints. A characteristic of mono-printing that sets it apart from a lot of other methods are the rough, textured marks prints usually have from where excess ink has transferred.
EQUIPMENT NEEDED;


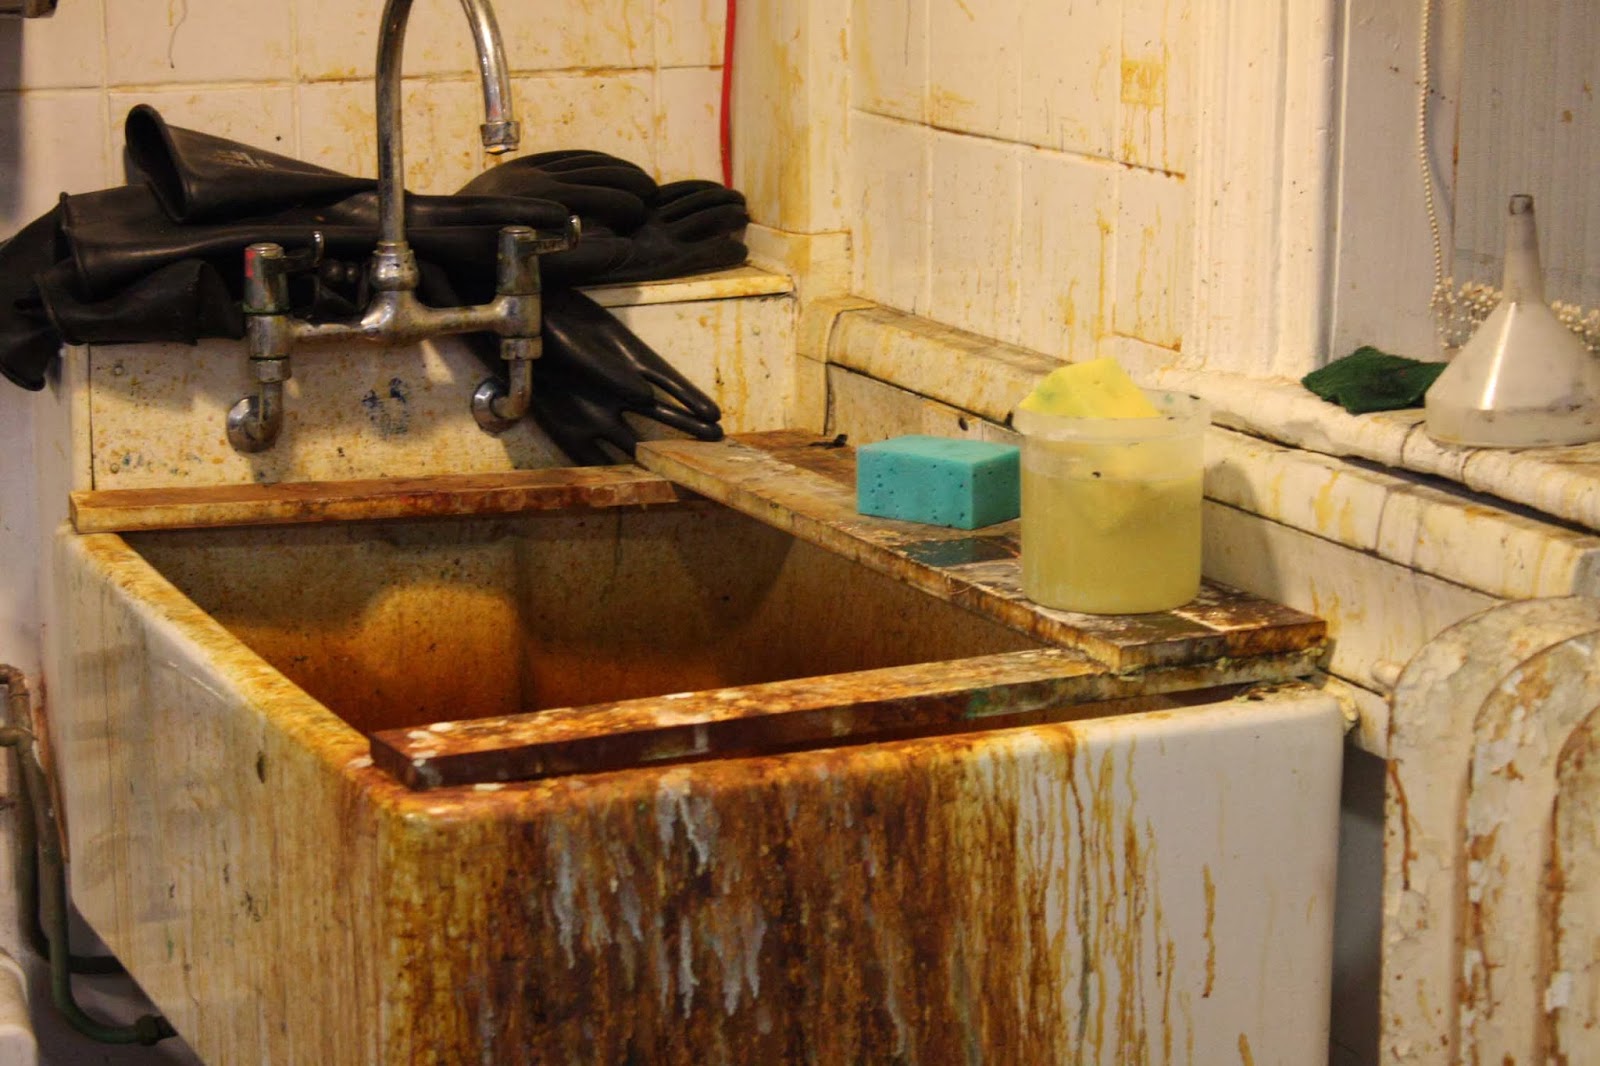
After you have finished printing it is very important to remember to thoroughly clean the work station. I made notes on the various stages of the cleaning process while cleaning up after my print experiment.
OVERVIEW
A mono-print is a printing method which entails placing stock on an inked surface while applying pressure to specific areas, this transfers the ink to the paper in the areas where most pressure is applied. Due to this the technique can only produce one off prints which is a big set back if you are looking to produce multiple prints. A characteristic of mono-printing that sets it apart from a lot of other methods are the rough, textured marks prints usually have from where excess ink has transferred.
EQUIPMENT NEEDED;
- Pallet knife.
- Relief ink.
- Rubber roller.
- Newsprint and desired stock.
- Glass surface or a plastic tray.
- Cleaning equipment.

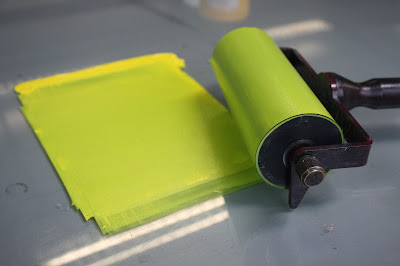
- To start the process get the relief ink and use the pallet knife to smear a strip of ink on the glass surface. Then use the rubber roller to evenly spread the ink until you have an even coating around the same size as your image.

- Next, use a sheet of newsprint and lie it over the freshly inked surface this will help to remove excess ink that could otherwise ruin the print. Then use your hand to rub over the paper applying a small amount of pressure. Finally, remove the sheet of newsprint and you are ready to go.

- Lie your chosen stock over the ink, followed by your chosen image. Then use a pencil or pen to trace over the picture. Remember, while tracing it is important neither the image or paper move as this could result in a disjointed outcome.

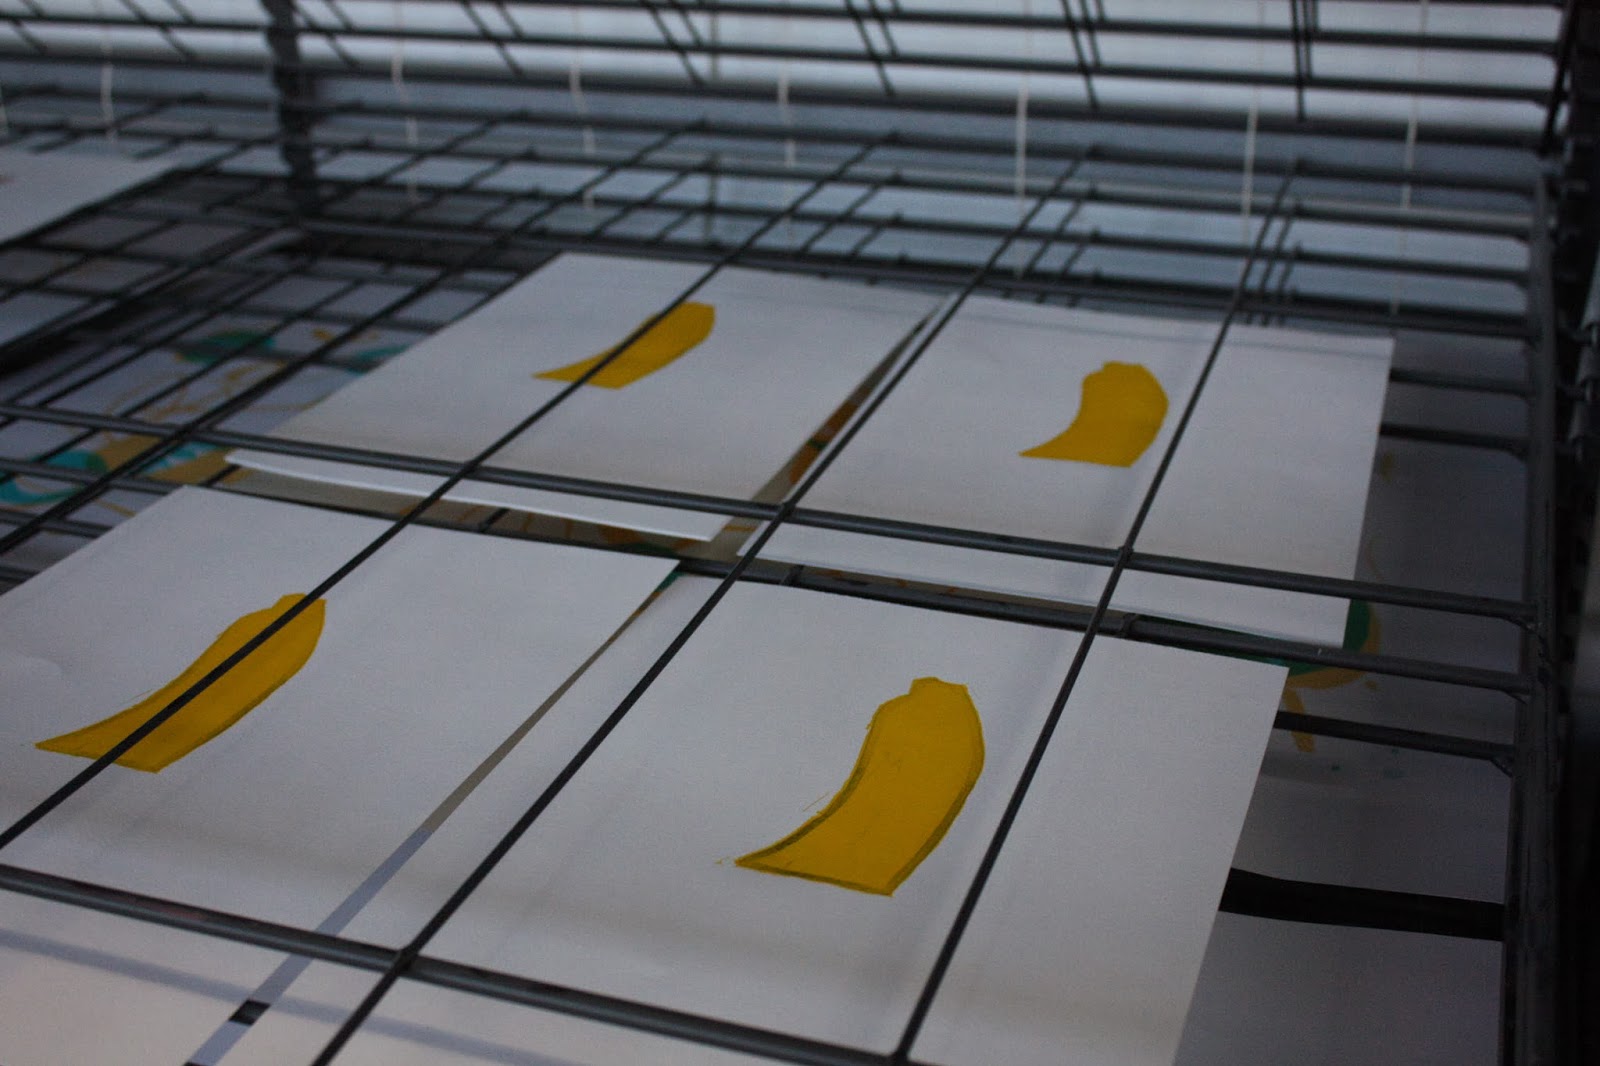
- After you have finished tracing the image carefully peel back your paper and put the print on a drying rack to dry.

- The end result.
- Using the pallet knife remove any excess piles of ink.
- Next, use an old dirty cloth and the oil spray to wipe over the inked area.
- Repeat the last step until the area is relatively free from ink.
- Next, use a new clean cloth and the soapy water spray to wipe over the area again, this will ensure all residue is removed.
- Repeat this process for the tools such as pallet knife and rubber roller (when cleaning the roller remove excess ink using a sheet of newsprint).
Secondary Research
I also carried out secondary research into the technique as there is only so much you can learn from completing the process. To help define more specific information first used a book called 'The Printmaking Handbook' By Louise Woods. I used this to highlight relevant and important information that will be beneficial for my audience when learning about the technique.


I also carried out secondary research into the technique as there is only so much you can learn from completing the process. To help define more specific information first used a book called 'The Printmaking Handbook' By Louise Woods. I used this to highlight relevant and important information that will be beneficial for my audience when learning about the technique.

- Makes a one off print.
- Marks and textures that can be obtained are characteristically different to those achieved with other methods.
- Simple technique, easy to do, no special studio equipment needed.
- Printing surface can be anything that is flat, smooth and non-absorbent, some suitable materials include glass, plastic or metal.

- It is important to avoid the movement of the paper as this will cause smudging or doubling.
- Any image created will be printed in reverse as with all relief printing methods.
- Mono prints can be single or multi-coloured, designers can utilize an overprint to build up colours.
- To overprint accurately registration marks should be used, this can be done with masking tape or by aligning the paper to the edge of the surface you are printing from.
- Variations of ink thickness and the pressure you apply when working will affect both the tone and texture of the piece.
Finally, read through the mono-print process guide available in the print room which walks you through all aspects of the process.


Lino-cut Prints
Primary Research
Lino-cut printing is a print method I am well acquainted with having experimented with it throughout college and university. However, I decided to created a simple two colour print so I could carry out some primary experiments with the technique.

OVERVIEW
A lino-cut print is another quick and simple printing method that entails cutting an image from a piece of lino, inking it up using a roller and then printing it using applied pressure. The lino sheet is used as a printing plate, once it has been cut multiple prints can be produced which makes it more suitable for big print runs than other methods such as a mono-print. Despite this the technique is very time consuming and therefore would be unsuitable for large numbered print runs.
EQUIPMENT NEEDED;
- Lino.
- Tracing paper.
- Cutting tools.
- Roller.
- Relief inks.
- Cleaning Equipment.

- First, sketch out the design that you would like to print. Trace the design using tracing paper and transfer it onto the lino. Remember, it is a relief print, so any imagery will need to be flipped or, once it has been printed your image will be backwards.
- A problem I have encountered while cutting lino is the definition of the pencil drawing on the lino, often it is very hard to distinguish between your pencil line and the lino. To overcome this I simply painted the surface white using acrylic paint.

- Once the image has been transferred use the cutting tools to remove the excess lino, this can be done in two ways. Remove the pencil lines and you will be left with a print that inks the whole size of the plate. However, if you remove the lino (like in the image above) you will be left with a plate that only prints the image.

- Use the pallet knife to spread a teaspoon amount of ink out for the roller.
- Then, using the rubber roller disseminate the ink evenly in a similar fashion to mono-printing. There should be a thin application on the surface of the table and roller.

- Next, use the roller to apply an even coverage of ink to the surface of the lino. If printing multiple colours then this should be done with the lightest colour first.

- Next, to prepare the stock for printing place it onto a bed of newsprint and place this onto a padded mat. Then place the print onto your stock and overlay the same combination of newsprint and mat. (only relevant if printing in college)

- Place the pile of elements into a printing press and compress the print, this will transfer the ink to the paper.

- After, carefully remove the mat, newsprint and lino and place the prints onto a drying rack.

- Once the first colour has completely dried the process can be repeated for the second darker colour.

- After all of the printing has been completed clean the tools and work space using the same methods as listed for mono-printing.

Secondary Research - 'The Print Making Handbook' by Louise Woods.
I also collected some focused secondary research into the print method, this allowed me to highlight information important to my audiences understanding of the technique.

- Printing press not essential.
- The technique is not suitable for very fine, detailed work.
- Prints can be printed in mono or milti-colour.
- Two types of lino available, the traditional style lino is called linoleum and is a corky composite material with a hessian backing (can be sent through laser cutter). The newer type of lino is much softer, and is made from a rubbery type of lino (cannot be sent through the laser cutter).

- Traditional lino - Warming the block before you start cutting makes the lino more mallebable. The lino will have a naturally oily surface but the surface can be degreased before work begins.
- Lino cutting tools are gouges and V-tools of different sizes.
- An ordinary craft knife can also be used to cut grooves into the block.
- Blunt tools tare lino, keep them sharp.
- A soft rubber roller is the best tool to use when inking plates as it is soft enough to ink detailed parts of the print.

- Designs should be sketched onto tracing paper so that they can be transferred onto the lino.
- To help you when cutting the block paint areas that will be cut away in white and areas that will be kept in white.
- When cutting the lino tool control is essential in making sure that you don't cut yourself and the print turns out well.
- When cutting the lino ensure that you are working on a table that is at a comfortable height.
- While cutting designers should move and rotate the print to compensate for the direction of the cut.
- Different tools produce different cuts varying in line width.
- Avoid cutting too deep as this can cause tools to slip and this is when accidents can occur. Moreover, you also run the risk of cutting all the way through the lino.
- If clearing a large area you need not cut it all using lino tools, designers can use a craft knife or scissors to cut away large excess areas.


- You can quickly check the progress of the print by placing a piece of paper over it and rubbing over the design with a pencil. Moreover, this will also allow designers to see which parts of the print need more work.
- When the lino is ready to print use the rubber roller to evenly dissipate the ink the surface of the print.
- If too much ink is put down you can take up some of the excess by running the roller over the print in one direction.
- You can print the design by placing paper over the inked lino and rubbing over it, or by sending it through a printing press.
- Multi-coloured lino prints can be prepared one of two ways, the first uses the reduction process. The reduction method uses successive cuts into the same block, a new colour is added after each reduction to build up the full colour print. The other method entails using two printing blocks, the first block acts as a master form which the second plate is cut.
- When printing multi-layered prints it is important to use registration marks.

- This part of the book visually communicates the process to the audience using photography. I will utilize similar methods of communication in my outcome as I believe that information is easier to digest when supported with imagery.
Primary Research
Lino-cut printing is a print method I am well acquainted with having experimented with it throughout college and university. However, I decided to created a simple two colour print so I could carry out some primary experiments with the technique.

OVERVIEW
EQUIPMENT NEEDED;
- Lino.
- Tracing paper.
- Cutting tools.
- Roller.
- Relief inks.
- Cleaning Equipment.

- First, sketch out the design that you would like to print. Trace the design using tracing paper and transfer it onto the lino. Remember, it is a relief print, so any imagery will need to be flipped or, once it has been printed your image will be backwards.
- A problem I have encountered while cutting lino is the definition of the pencil drawing on the lino, often it is very hard to distinguish between your pencil line and the lino. To overcome this I simply painted the surface white using acrylic paint.

- Once the image has been transferred use the cutting tools to remove the excess lino, this can be done in two ways. Remove the pencil lines and you will be left with a print that inks the whole size of the plate. However, if you remove the lino (like in the image above) you will be left with a plate that only prints the image.

- Use the pallet knife to spread a teaspoon amount of ink out for the roller.

- Then, using the rubber roller disseminate the ink evenly in a similar fashion to mono-printing. There should be a thin application on the surface of the table and roller.

- Next, use the roller to apply an even coverage of ink to the surface of the lino. If printing multiple colours then this should be done with the lightest colour first.

- Next, to prepare the stock for printing place it onto a bed of newsprint and place this onto a padded mat. Then place the print onto your stock and overlay the same combination of newsprint and mat. (only relevant if printing in college)

- Place the pile of elements into a printing press and compress the print, this will transfer the ink to the paper.
- After, carefully remove the mat, newsprint and lino and place the prints onto a drying rack.

- Once the first colour has completely dried the process can be repeated for the second darker colour.

- After all of the printing has been completed clean the tools and work space using the same methods as listed for mono-printing.

Secondary Research - 'The Print Making Handbook' by Louise Woods.
I also collected some focused secondary research into the print method, this allowed me to highlight information important to my audiences understanding of the technique.

- Printing press not essential.
- The technique is not suitable for very fine, detailed work.
- Prints can be printed in mono or milti-colour.
- Two types of lino available, the traditional style lino is called linoleum and is a corky composite material with a hessian backing (can be sent through laser cutter). The newer type of lino is much softer, and is made from a rubbery type of lino (cannot be sent through the laser cutter).

- Traditional lino - Warming the block before you start cutting makes the lino more mallebable. The lino will have a naturally oily surface but the surface can be degreased before work begins.
- Lino cutting tools are gouges and V-tools of different sizes.
- An ordinary craft knife can also be used to cut grooves into the block.
- Blunt tools tare lino, keep them sharp.
- A soft rubber roller is the best tool to use when inking plates as it is soft enough to ink detailed parts of the print.

- Designs should be sketched onto tracing paper so that they can be transferred onto the lino.
- To help you when cutting the block paint areas that will be cut away in white and areas that will be kept in white.
- When cutting the lino tool control is essential in making sure that you don't cut yourself and the print turns out well.
- When cutting the lino ensure that you are working on a table that is at a comfortable height.
- While cutting designers should move and rotate the print to compensate for the direction of the cut.
- Different tools produce different cuts varying in line width.
- Avoid cutting too deep as this can cause tools to slip and this is when accidents can occur. Moreover, you also run the risk of cutting all the way through the lino.
- If clearing a large area you need not cut it all using lino tools, designers can use a craft knife or scissors to cut away large excess areas.


- You can quickly check the progress of the print by placing a piece of paper over it and rubbing over the design with a pencil. Moreover, this will also allow designers to see which parts of the print need more work.
- When the lino is ready to print use the rubber roller to evenly dissipate the ink the surface of the print.
- If too much ink is put down you can take up some of the excess by running the roller over the print in one direction.
- You can print the design by placing paper over the inked lino and rubbing over it, or by sending it through a printing press.
- Multi-coloured lino prints can be prepared one of two ways, the first uses the reduction process. The reduction method uses successive cuts into the same block, a new colour is added after each reduction to build up the full colour print. The other method entails using two printing blocks, the first block acts as a master form which the second plate is cut.
- When printing multi-layered prints it is important to use registration marks.

- This part of the book visually communicates the process to the audience using photography. I will utilize similar methods of communication in my outcome as I believe that information is easier to digest when supported with imagery.
Etching
The results from my survey show that etching was one of the most popular print methods used amongst my target audience. The method is similar to lino printing as the image is etched onto a plate which is then inked up and pressed against stock. However, etchings allow designers to create much more detailed and accurate lineage due to the intricate lines that can be created with engraving tools.
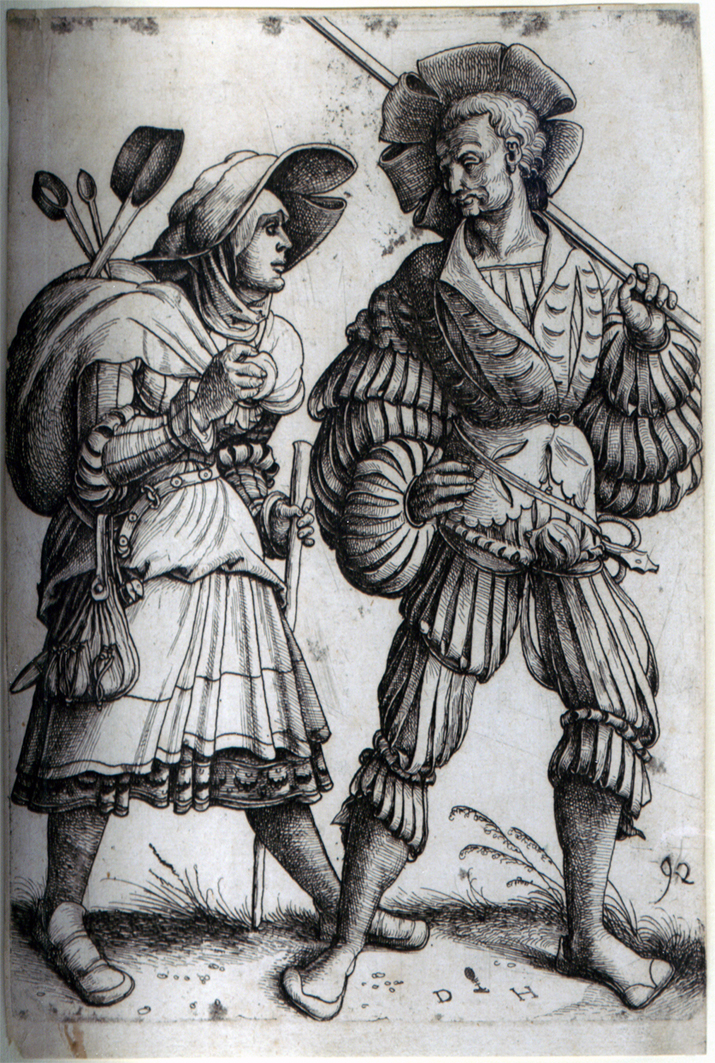
This old etching shows the detail that can be achieved using the method - Link.
OVERVIEW
Etching is one of the oldest intaglio print methods, it involves removing metal from the etching plate in narrow grooves to create an image. The method is relatively cheap and is similar to a lino print in the sense that it is a relief print and allows designers to produce multiple copies of one print.
EQUIPMENT NEEDED;
- Etching plate.
- Engraving tools.
- Sandbag.
- Carbon paper.
- Acid.
- Relief ink.
Primary Research
As I am working to a tight time-scale I unfortunately do not have enough spare time to create my own etching plate print, however this is not a problem as I have completed the process before while on my foundation course. Despite this, I want to renew my knowledge of the method as I feel as time has past that I have forgotten key parts of the process. Therefore I attended a workshop at 'Rossington Street' which touched on how to prepare a copper plate for the etching process.


As I am working to a tight time-scale I unfortunately do not have enough spare time to create my own etching plate print, however this is not a problem as I have completed the process before while on my foundation course. Despite this, I want to renew my knowledge of the method as I feel as time has past that I have forgotten key parts of the process. Therefore I attended a workshop at 'Rossington Street' which touched on how to prepare a copper plate for the etching process.

- The process is started by preparing the copper plate, this is done by sanding its surface and filing the edges so that they are not sharp. The surface of the copper plate should be free from any deep scratches or impurities as they will show up on the final design.

- Dry using a sheet of newsprint.

- Coat the surface of the plate using a liquid varnish or enamel paint, otherwise known as a ground.

- Once the ground has dried, scratch into the plate using the engraving tools.
- Next, after the design has been etched onto the copper plate it should submerge in an acid bath, the acid will eat away at the exposed areas left by the engraving tools. The ground acts as a resist to the acid and stops it from eating away covered areas.

- With rubber gloves remove the plate from the acid bath and clean with soapy water and a cloth.

- The plate is now ready for printing.
- To print the plate cover its surface in relief ink, then using an old cloth remove all of the excess ink. Ensure that all of the ink is removed from the surface of the copper as any ink left on the plate will transfer onto the stock.
Secondary Research
As I did not have chance to complete the print method first hand I felt the need to collect further secondary research into the process. I started this by organizing information taken from the book; 'The Printmaking Handbook' By Louise Woods.

- Etching is one of the oldest intaglio printing techniques.
- The burin is the tool used for marking the metal plates, and is usually a sharp steel rod.
- When engraving the burin is usually held at a very shallow angle and is maneuvered as an extension of the hand.
- The plate needs preparing before any cutting work can commence.
- Tools needed consist of; a sandbag for support, burins for engraving.
- As well as burins you will also need carbon paper, a pen or hard pencil and nitric acid.

- For the best results ensure that all tools used are sharp.
- When inexperienced it is useful to practice burin control on a scrap plate.
- An engraving produces a mirror image of the design cut into the plate.
- The best way to prepare a plate is to transfer the design onto the plate using carbon paper. Then if you place the plate in nitric acid the carbon acts as a resister, upon cleaning the plate with denatured alcohol of the design will come up shiny against the dull background.
- Lines can be made by pushing the burin gently forward into the metal. Relieving the pressure allows the burin to come back to the surface of the plate, a technique that can be used to create pointed line work.
- Lines can be retraced with the burin to deepen grooves.
- When cutting fine spirals of metal will be left on the design, these can be removed using a scraper.
- The deeper the line is cut the darker it will appear when printed.
- Dots can be made by jabbing the burin into the plate.
- Shadow and texture are effects that can be obtained by engraving thin lines next to each other in close proximity. Similar effects can also be achieved by cross-hatching.
- All small marks and lines will show up on the print, to remove unwanted cuts simply rub over the area with a burnisher or snakestone.

A burnisher - Link

A snakestone, used for removing surface marks - Link
I also collected further secondary research into the etching process from a website called 'Wiki How'. The process illustrates how to prepare a steel plate for etching, although not copper the methods used to etch them are almost identical.


Unfortunately, the letterpress printing facilities are currently unavailable due to a recent move from Rossington street to Blenheim walk. Despite this, I was still able to quickly tour the facilities and walk through the process.


- The site utilizes illustrative imagery to visually support the information communicated by they text. My outcome will also use imagery, however the illustrations will be much more simple and refined to suit the theme of my outcome.


Letter Press Printing
Letter press printing is a relief printing process that I was briefly introduced to last year
OVERVIEW


EQUIPMENT NEEDED;
PRIMARY RESEARCH


- Letterpress printing is a technique which has been used in the west since it was invented by Johannes Gutenberg.
- Letter press printing involves locking movable type into the bed, inking it and pressing it against paper to form an impression.
- A basic letterpress consists of a press bed, rubber rollers, and a tympan (The tightly stretched drum or disc that the paper is attached to).
- For multiples colours a print will require multiple passes through the press.
- Split fountain - several colours of ink are spread on the rollers.
- Time consuming print technique.
- Higher commercial cost.
- Type for letterpress printing is usually made from lead.
- Linotype machines allow designers to cast lines of type.
EQUIPMENT NEEDED;
- Metal type.
- Frame (for setting the type in).
- Letterpress printing press.
- Ink.
- Stock.
Unfortunately, the letterpress printing facilities are currently unavailable due to a recent move from Rossington street to Blenheim walk. Despite this, I was still able to quickly tour the facilities and walk through the process.

- The 'Job Case' contains all of the metal type.
Job case diagram - Link

- An individual letter 'b'.

- The typographic composition is arranged into a frame and is tightened into place using quoins and a key. Quoins are the devices used to lock all the type in position, using the key you are are able to adjust the width of the quoin and increase the pressure placed on the typographic arrangement.


Secondary Research
Terminology
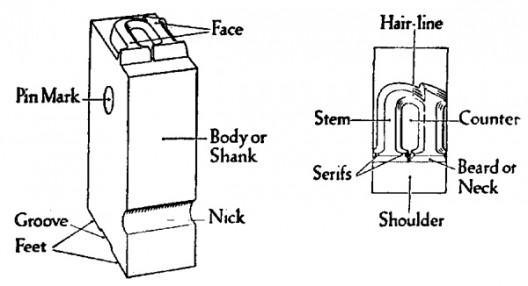
- These simple illustrations effectively communicate different terminology associated with type.
- My outcome could include similar diagrams to help communicate information to my audience.
NOTES;

Screen-printing
Screen-printing is a print method that I have utilized regularly to produce my graphic outcomes, the technique is versatile, cheap and is capable of producing high quality prints. The results from my survey showed that screen-printing was one of the most relevant print method available to my target audience, and so it will be featured as one of the print methods in my outcome.

OVERVIEW
A form of printing in which a thick paste ink is forced through a stencil attached to a finely-woven mesh screen, transferring ink to the desired substrate in those areas not covered by the stencil. The printing method is used to print almost any surface imaginable, from paper to wood.
EQUIPMENT NEEDED;
- A silk-screen (43t for fabric 120t for paper).
- Cleaning equipment.
- Photographic emulsion.
- Light exposing unit.
- Rubber squeegee.
- Inks & Binder.
- Tapes (Masking & Parcel).
- Print bed.
Primary Research.
Screen printing is another print method that I am well versed with, working with it in both during my foundation year at college and now at university. Despite the knowledge and experience I have with the technique I decided to complete some primary research and run through the process.
The prints content was generated as part of a personally generated concept, this way I can produce a usable outcome as the same time as completing a primary print experiment.

- After finding the corrects size screen for your outcome you will need to clean off the old emulsion. Before doing this however you must first gear up in the appropriate protective clothing: a face mask, eye protection, protective gloves, ear protection and protective clothing.

- Next, in the wash booth, you can begin to clean the screen. Steps on how to do this are on the wall.
- Remove all parcel and gummed tape from the screen before bringing it into the wash bay, this helps to stop the plug hole from blocking up.
- Step 1 - Put on all protective gear.
- Step 2 - Sponge on B-strip to screen with sponge then rinse with normal hose. Then blast off any remaining emulsion with the power washer.
- Step 3 - Sponge on B-solve and leave screen for ten minutes. Upon returning rinse with the normal hose then blast off with power hose.
- Step 4 - Degrease with washing up liquid and lots of water.

- Screens left with B-solve on.

- Screens in the second wash bay being degreased with soapy water and a sponge.

- At this point in the process you should write your name, course and the date on some gummy tape, the tape is then wet and bonded to the screen.

- After cleaning the screen and adding the tape leave to dry for 20-30 minutes in the drying room.

- Once the screen has completely dried you can start with the next stage of the process, coating the mesh in light sensitive emulsion.
- For this part of the process you need a trough, light sensitive emulsion, a large spoon and cleaning equipment.

- Poor the emulsion from the bucket into the trough.

- Tip the trough against the screen until the emulsion runs against the mesh, then in a smooth movement move the tilted trough upwards towards the top of the screen.
- Remove any excess emulsion with the trough tilted backwards so no more emulsion is being applied to the screen.
- Spoon the excess emulsion back into the bucket.
- Clean the equipment used with soapy water and a sponge, ensure that all traces of the emulsion are removed.

- Place the coated screen into one of the heated drying racks and leave for 20-30 minutes.

- Once the emulsion has dried you can expose the screen on the light exposing unit. My print was printed on 80gsm paper and had some greyscale elements, therefore it needed 170 light units of exposure.

- Once the light exposing unit has finished place the screen back into the wash bay and thoroughly wash with the sponge, hose pipe and soapy water. Ensure that all remains of the unwanted emulsion are removed at this stage, failing to do so could leave you with a blotchy print.
- Place the cleaned screen back into the drying room and leave for 20-30 minutes to completely dry.

- Once the screen has dried you are ready for the printing part of the process.
- Firstly, all paint must be mixed with binder to ensure that it does not dry up in the screen while working. (unless using pre-mixed inks)
- The ratio should be 2/3 binder 1/3 paint.

- Before moving your screen onto the print beds mask around the uncovered edges with parcel tape like shown in the image above.
- Next, secure your screen onto the print bed by adjusting the arms and clamps found on the bed.
- A rubber squeegee will be needed to pull the ink across the screen.
- Use a spoon to apply a generous slug of ink onto the screen. Then, while applying pressure on the squeegee drag the ink over the design to print onto the tru-grain acetate.
- Paper registration - Placing paper under the acetate allows you to see where the design will be printed, once you have a desired position mark the position of the two bottom corners of the stock with masking tape.
- Remove the tru-grain and repeat the squeegee process to print onto the stock.
- Finally, once you have completed the desired number of prints use one of the wash bays to clean all the equipment used.

- Place all prints onto a drying rack to prevent smudges and dirt from affecting the outcome.
DIGITAL PRINT - RESEARCH
Firstly, I started my digital print research by listing the different methods my guide could feature;
I have also messaged commercial printers 'Hobs Reprographics' to inquire if I can visit their print studio to learn about some of their digital print processes.
- Offset Lithograph.
- Flexography.
- Ink Jet.
- Risograph.
- Laser Cut.
I have also messaged commercial printers 'Hobs Reprographics' to inquire if I can visit their print studio to learn about some of their digital print processes.

I also messaged a risograph printers in Leeds called the 'Footprint Workers Co-op'. Risograph printing is an environmentally friendly print method that produces results similar to screen-printing, I am interested in learning more about the technique as it has a lot of relevance to my design practice.

REPLY
The footprint Workers Co-op were happy to help and so I arranged a trip for me and a small group of fellow students to visit their studio to learn more about the print method.


OFFSET LITHOGRAPH PRINTING - SECONDARY RESEARCH
Offset lithograph printing is a print method that uses an inked image that is offset from a plate to a rubber blanket, the image is then transferred onto the stock. Lithograph printing is primarily used for large print runs, although it is still a popular technique that is used regularly in the design industry. For this reason the method has relevance to my audience and therefore outcome.

APPLICATIONS
Typical lithograph applications include;
- General commercial printing
- Books
- Magazines.

DETAILS
Lithography is an "offset" printing technique. Ink is not applied directly from the printing plate (or cylinder) to the substrate as it is in gravure, flexography and letterpress. Ink is applied to the printing plate to form the "image" (such as text or artwork to be printed) and then transferred or "offset to a rubber "blanket". The image on the blanket is then transferred to the substrate (typically paper or paperboard) to produce the printed product.

Print diagram - Link

LITHOGRAPHIC INK
The inking system primarily functions to transfer ink from the ink fountain to the printing plate, to add enough force to break the thick, viscous ink down into a thinner, more workable ink film, and to prevent the existence of faint reproductions of the printing image on the ink rollers.
The amount of ink that is sent to the rest of the press can be controlled either by adjusting the ink fountain's fountain keys, which vary the amount of ink transferred to the fountain roller—the roller that contacts the first roller in the train—or by adjusting the dwell—the amount of time that the first ductor roller contacts the fountain roller.
Information link - Link
ADVANTAGES OF OFFSET LITHOGRAPH PRINTING;
- Consistent high image quality.
- Offset printing produces sharp and clean images and type more easily than letterpress printing because the rubber blanket conforms to the texture of the printing surface.
- Quick and easy production of printing plates.
- Longer printing plate life than on direct litho presses because there is no direct contact between the plate and the printing surface.
- Properly developed plates running in conjunction with optimized inks and fountain solution may exceed run lengths of a million impressions.
- Cost. Offset printing is the cheapest method to produce high quality printing in commercial printing quantities.
DISADVANTAGES OF OFFSET LITHOGRAPH PRINTING;
- Slightly inferior image quality compared to rotogravure or photogravure printing.
- Propensity for anodized aluminum printing plates to become sensitive (due to chemical oxidation) and print in non-image/background areas when developed plates are not cared for properly.
- Time and cost associated with producing plates and printing press setup. This makes smaller quantity printing jobs impractical. As a result, smaller printing jobs are now moving to digital offset machines.
Information link - Link
Finally, we also had an organised print lecture with Jason from 'Evolution Press' in Sheffield. During the lecture Jason talked about various parts of the lithographic print process as the company print the majority of their outcomes using a sheet fed lithographic printer.
Lecture link - Link
FLEXOGRAPHY PRINTING - SECONDARY RESEARCH

APPLICATIONS
Flexography is the major process used to print packaging materials.
- Flexography is used to print;
- Corrugated containers
- Folding cartons
- Multiwall sacks
- Paper sacks
- Plastic bags
- Milk and beverage cartons
- Labels
- Newspapers
- Wrappers (food)
DETAILS
The first roller transfers the ink from an ink pan to the meter roller or Anilox Roll, which is the second roller. The Anilox roller meters the ink to a uniform thickness onto the plate cylinder. The substrate then moves between the plate cylinder and the impression cylinder, which is the fourth roller.
The impression cylinder applies pressure to the plate cylinder, thereby transferring the image onto the substrate. The web, which by now has been printed, is fed into the overhead dryer so the ink is dry before it goes to the next print unit.
After the substrate has been printed with all colors the web MAY be fed through an additional overhead tunnel dryer to remove most of the residual solvents or water. The finished product is then rewound onto a roll or is fed through the cutter.
Information link - Link
I also watched this informative video on the flexographic printing process.
INKJET PRINTING
Inkjet printing is one of the most popular digital print methods used among my target audience, the technique allows designers to print in a variety of colours at various scales and its fairly cheap! Inkjet printers can accurately produce of a large variety of colours using dots of CMYK ink, this means that spot colours cannot be used when printing with the method.
I will feature the print method in my final outcome due to its relevance to my target audience.

Large format inkjet printer - Link.
OVERVIEW
Inkjet printers are a type of computer printer that operates by propelling tiny droplets of liquid ink onto paper. They are the most common type of computer printer for the general consumer due to their low cost, high quality of output, capability of printing in vivid color, and ease of use.
There are several types of Inkjet printing, which can be classified into the method used to deposit the ink:
Thermal inkjet;
Most consumer ink jet printers work by having a print cartridge with a series of tiny electrically-heated chambers constructed by photolithography. To produce an image, the printer runs a pulse of current through the heating elements. A steam explosion in the chamber forms a bubble, which propels a droplet of ink onto the paper (hence Canon's tradename for its inkjets, Bubblejet). The ink's surface tension pulls another charge of ink into the chamber through a narrow channel attached to an ink reservoir.
Piezoelectric Inkjet;
All Epson printers and most commercial and industrial ink jet printers use a piezoelectric material in an ink-filled chamber behind each nozzle instead of a heating element. When a voltage is applied, the crystal changes shape or size, this generates a pressure pulse in the fluid forcing a droplet of ink from the nozzle. This is essentially the same mechanism as the thermal inkjet but generates the pressure pulse using a different physical principle. Piezoelectric ink jet allows a wider variety of inks than thermal or continuous ink jet but is more expensive.
Continuous Inkjet;
The continuous ink jet method is used commercially for marking and coding of products and packages. The first patent on the idea is from 1867, by William Thomson. The first commercial model was introduced in 1951 by Siemens. In continuous ink jet technology, a high-pressure pump directs liquid ink from a reservoir through a microscopic nozzle, creating a continuous stream of ink droplets. A piezoelectric crystal causes the stream of liquid to break into droplets at regular intervals. The ink droplets are subjected to an electrostatic field created by a charging electrode as they form. The field is varied according to the degree of drop deflection desired. This results in a controlled, variable electrostatic charge on each droplet. Charged droplets are separated by one or more uncharged “guard droplets” to minimize electrostatic repulsion between neighboring droplets.
Information Link - Link.
- Inkjet printers work by propelling tiny dots of liquid ink onto a stock.
- Most common method of print due to their low cost and high quality outcomes.
- Inkjet printers are capable of printing in vivid colour.
- There are several methods of inkjet printing which can be classified into three categories.
- Thermal inkjet - Utilizes electronically heated chambers constructed of photolithography. To produce the image the computer sends electrical currents through the heating elements, this causes a reaction which propels the ink drop onto the stock. The inks surface tensions pulls another droplet into the chamber as it leaves.
- Piezoelectric inkjet - Most commercial printers use a piezoelectric material in an ink filled chamber behind each nozzle. When voltage is applied, the crystal changes shape or size generating a pressure pulse in the fluid, forcing a droplet of ink from the nozzle. This technique is essentially the same as the thermal inkjet but generates an ink droplet using a different physical principle.The piezoelectric inkjet allows for a wider variety of inks than thermal, however it is more expensive.
- Continuous inkjet - A high pressure pump directs liquid ink from a reservoir through a tiny print nozzle creating a continuous line of ink droplets. The ink droplets are subject to an electrostatic field created by a charge as they form. The field is varied depending on the drop deflection desired, resulting in a variable electrostatic charge on each droplet. Charged droplets are separated by one or more uncharged ink droplets to minimize the electrostatic repulsion between neighboring droplets.

this is how a thermal inkjet printer works, diagrams like this are useful in helping the audience understand complicated information - Link.

Piezoelectric Inkjet diagram - Link

Continuous Inkjet diagram - Link
GRAVURE PRINTING - SECONDARY RESEARCH
Gravure printing is characteristically used for long run, high quality printing as it is capable of producing a sharp, fine image. Due to the cost of the press and the high cost of the cylinders the print methods is quite expensive.

- My outcome could contain similar diagrams to help visually communicate the process to the audience. I want my outcome to include various illustrations to balance out the informative text.
Applications:
Typical gravure printed products include:
- Food packaging
- Wall paper
- Wrapping paper
- Furniture laminates
- Paneling
- Greeting cards
- Magazines

DETAILS
Almost all gravure printing is done using engraved copper cylinders protected from wear by the application of a thin electroplate of chromium. The cylinders (image carrier) used in rotogravure printing can be from three inches in diameter by two inch wide to three feet in diameter by 20 feet wide. Publication presses are from six to eight feet wide while presses used for printing packaging rarely exceed five feet. in width. Product gravure presses show great variation in size, ranging from presses with cylinders two inches wide, designed to print wood grain edge trim, to cylinders 20 feet wide, designed to print paper towels. The basics of Gravure printing is a fairly simple process which consists of a printing cylinder, a rubber covered impression roll, an ink fountain, a doctor blade, and a means of drying the ink.
- Gravure printing is done using engraved copper cylinders.
- Cylinders can vary vastly in size, from publication presses which are around six feet wide to cylinders twenty foot wide designed for printing on paper towels.
- Very adaptable print method.
- The method consists of a rubber covered impression roll, an ink fountain, a doctor blade and a means of drying the ink.

Gravure printing cylinder - Link
Gravure Inks - Solvent Based, Water Based
Gravure inks are fluid inks with a very low viscosity that allows them to be drawn into the engraved cells in the cylinder then transferred onto the substrate. In order to dry the ink and drive off the solvents or water, which essentially replaces most of the solvent, the paper is run through Gas fired or electric fired driers. The ink will dry before the paper reaches the next printing station on the press. This is necessary because wet inks cannot be overprinted without smearing and smudging. Therefore, high volume air dryers are placed after each printing station.
The solvent-laden air from the dryers is passed through either a solvent recovery system or solvent vapor incinerator. A typical recovery system uses beds of activated carbon to absorb the solvent. Saturated beds are regenerated by steam. The solvent laden steam is then condensed and the water and solvent separate by gravity. Greater than 95 percent of the ink solvents can be recovered using this process (Buonicore). The solvents can either be reused or destroyed by incineration.
Water based inks, especially used for packaging and product gravure, require a higher temperature and longer drier exposure time in order to drive off the water and lower vapor pressure constituents. As mentioned subsequent sections, Flexo and Gravure inks are very similar and the constituents are essentially the same. Again, a pollution control device may be needed.
- Gravure inks are fluid inks with a low viscosity that allows it to be easily drawn into the grooved cells of the cylinder.
- Inks need to be dired by gas or electric fired dryers.
- Inks cannot be overprinted without smearing.
- Flexograph and gravure inks are very similar.
- Not a very environmentally friendly print method.
Although the print method is well used within the industry for large scale print runs, due to the sheer cost of the print run it seems out of reach for my target audience. A similar technique that costs much less money is offset lithograph printing and therefore, of the two methods my guide will feature the cheaper method as it has more relevance to my target audience.
All Gravure printing information was taken from - Link
RISOGRAPH PRINING - Secondary Research
Risograph is a stencil duplication process, meaning that it is in the same family as Screen Printing, except that it was initially designed for business printing purposes. The machine, from the outside, looks just like a photocopier, but the guts are entirely different. Like an offset press, Risograph printers use Plates, or Masters (made from wax paper), which means that it prints one colour/one layer at a time. Each additional layer requires an additional pass through the machine.
- The technique is similar to screen printing, this could provide the transition from digital to hand print methods in my outcome.
HOW DOES THE PRINTER WORK?

The paper makes a straight pass, from left to right, through the machine, while a rotating silk-screen-like drum unit pushes soy-based ink through the stencil master and onto the sheet, one side and one layer at a time. Much like a Mimeograph, the Risograph is based on Duplication technology.
AVAILABLE COLOURS
Risograph printers are limited to a certain number of commercially available colours.

RISOGRAPH PANTONE EQUIVALENTS | PMS VALUES
Yellow (102 M) | Fluorescent Pink (231 M) | Orange (1505 M) | Red (199 M)
Green (354 M) | Teal (330 M) | Blue (2935 M) | Purple (268 M)
Brown (4705 M) | Flat Gold (465 M) | Light Gray (422 M) | Black (Process Black)
- My print guide could utilize a similar colour grid to show the audience the colours available and how they are affected by opacity.
OVER PRINTS
This chart below shows all of the possible two colour interactions of the colours made available by most risograph printers. The patchwork of colours acts as a reference chart of possible Overprints: two inks printed overtop of one another.
This is a great way to only pay for two colours of ink to make three. If you like a colour on the chart, you can prepare your file by following the opacity settings indicated: All Horizontal Bars are 35% Opacity, while all Vertical Bars are 65% Opacity. Follow the colours listed on the left and bottom.

- Setting up artwork for risograph printing should be approached in a similar way to screen printing, with individual colours separated into layers.
PRINTABLE AREA & INK DENSITY
There are some delicate things to take into consideration here such as, you cannot cover the entire page in ink. The Riso just cannot handle outputting an entire page’s worth of ink evenly. Large solid sections of ink may not appear consistent. Expect large solids to be possibly uneven. Ideally a large section of ink should be run at 70-80%, this way the halftone applied by the machine will help to regulate the flow.
For prints with multiple layers/colours, you cannot put any heavy ink coverage in the first 3″ at the center of the page. The feed rollers that grip the paper will pick up and track the ink across the page (but don’t worry, these track marks can easily be erased). For images with a lot of colours/layers, it is best to aim for a final product of 11″ x 14″. When printed on an 11″ x 17″ sheet, those extra 3″ are used just to grip the paper and will be cut off once the prints are finished.
ENVIRONMENTALLY FRIENDLY!
Risograph prints are made with Soy Ink and because of the machine’s mechanical simplicity do not use very much energy (unlike photocopiers, which gobble up electricity with their hot hot fusers and elaborate paper paths).
- Links to my design practice and personal manifesto.
COLOUR SEPARATIONS
Creating good separate files for each layer is one of the biggest hurdles in getting the prints made.
For Posters, simply making each colour a different layer in your software of choice and then turn those into greyscale files.
For Publications, or any kind of multi-page format, it might be easiest to follow along below and learn about “Mapping Spot Colours to Process Colours”

Here is the image that we’ll use to better understand how Colour Separation, Overprinting, and Ink Blending works. The above scan of a print uses only two inks, Blue & Yellow, to create the appearance of a third: Green. The lighter shades of colour are made from a reduced tonal value, as seen below:

Using the CMYK Colour Mode, you can create an image like the one above, where you indicate the intensity of a colour through a percentage value. The darkest blue is measured at 100% CYAN. The darkest yellow is 100% YELLOW. When these two colour values are printed overtop of one another the result is that deep, dark green. Following suit, the other values indicated in the image above are: 50% CYAN & 50% YELLOW, 10% CYAN & 10% YELLOW. Working in a CMYK model can make separations easy to create, either through splitting the channels (Photoshop), or exporting your file as separate plates (PDF). This process is called: Mapping Your Spot Colours To Process Colours, and it is a common approach to creating easy, simple, multi-coloured images.

This image above shows what your CYAN Layer should look like when it is separated and Ready-For-Print. Of course, when printing on a Risograph, the CYAN can be representative of any available colour. This image shows what values a printer reads to create one of the two layers needed to make the isometric image above.

This image above shows what your YELLOW Layer should look like when it is separated and Ready-For-Print. These two layers when put together can create a third colour. This is where the 2-Colour Overprint Chart can come in handy when trying to estimate how colours will interact, and what range of third colours is available. For the purpose of this little tutorial we’ve used an even split of values (50/50), but of course your image can contain any variety of tonal percentages (1% – 100%). A higher YELLOW number and lower CYAN number would create a different green than the one displayed.
- The colour charts are essential in getting an accurate understanding of how the colours interact with each other when overlaid. If my guide covers the Risograph printing technique then I will need to include a similar diagram.
- I need to find out if Risograph printing is available at university.
A terminological note: Registration is what University Students do at the start of a term, whereas Register refers to the alignment of two or more colours in printing.
CYMK STYLE PRINTS
The four colour prints use the closest matches to a CMYK image that RISO Ink allows. Utilizing Blue, Fluro Pink, Yellow, and Black printers are able to make prints that look almost like full CMYK.
- The technique creates an effect similar to a screen-printed photographs that use a four colour separation. The image is made up from layers of small coloured dots that form tiny rosette shapes. I decided to review this area in more detail below.
DUOTONES
Photographs can also be rendered in two colours. Called a Duotone, this printing method utilizes two contrasting colours to draw out mid tones and highlights.

Duotone made with Fluro Pink & Yellow Ink - Link
I also arranged to visit a Risograph printing studio to learn more about the process and collect some primary research.

The link for the studio visit post is below.
Link - http://j-harrisonreader1215-dc.blogspot.co.uk/2013/11/design-production-footprint-workers-co.html
LASER CUTTING - PRIMARY RESEARCH
The laser cutter is a piece of equipment that I have wanted to experiment with for a while now, it can be used to cut and engrave a variety of materials such as wood, plastic and glass. The technique has relevance to my audience as the printer can be used to create effective aesthetic elements on a range of materials that would usually out of bounds to students and designers.
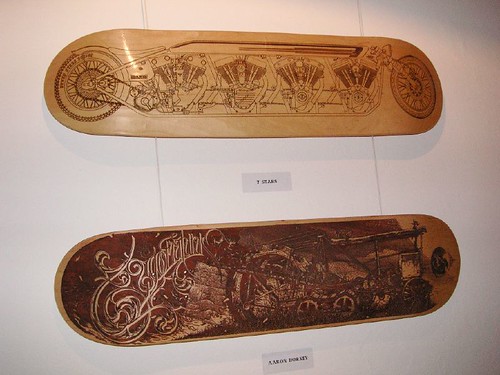
These laser engraved skateboard decks by Aaron Horkey caught my attention while collecting research for my summer brief - Link
OVERVIEW
Laser printing is a digital print method which utilizes a laser to engrave images onto a variety of materials ranging from wood to plastic. The technique is useful for my target audience as it allows them to broaden their stock choices and reduce the limitations that are often presented using other print methods.

EQUIPMENT NEEDED;
- Computer.
- Laser printer.
- Stock.
LASER CUTTER - PRIMARY RESEARCH
As I have never used the print method before I had to undertake an induction which walked us through the laser print process.

- To turn the machine on press the green 'ON' button. The control panel also houses the 'OFF' button and the emergency stop.

- To prepare the machine for cutting press; Hand > Menu > Enter.

- Open the cutting software and set up the design accordingly for print, when doing this there are four cuts that can be chosen, each creates a different effect.
- Cut through - Like the name implies this technique involves the laser cutting straight through the stock.
- Engrave - Engraves the design into the stock.
- Kiss-cut - Similar to the engrave setting but produces a much lighter cut.
- Raster - The laser removes material by cutting individual lines next to each other.

- The laser printer at work creating a raster text cut on some acrylic stock.

- Visual example of the four cuts available - My outcome could illustrate these effects to help the audience visualize the achievable effects.

- Shot of the laser cutting some material.
STOCKS
While in the workshop we were also shown examples of the materials that can be cut into.

- The laser cutter will print designs onto wood quite easily, this could be beneficial to designer creating packaging or looking to experiment with different stock.

- Cutting into cardboard could be useful for creative packaging design.

- The laser cutter is also able to cut into lino, enabling designers to transfer complicated designs onto lino which can then be inked up and printed.

Laser cut lino prints - Link

- The printer is also capable of cutting acrylic plastic.
LASER CUTTER - SECONDARY RESEARCH
I started collecting secondary research into the laser cutting print method from the book 'The production Manuel' by Gavin Ambrose & Paul Harris.

- The laser cutter is used to cut shapes into the stock.
- Quicker and more accurate than using a metal cutting tool such as a scalpel.
- Quick turnaround time for work.
- Can be used to create various effects such as cut through and engrave.
No comments:
Post a Comment